<< Your IP
iPad Email Configuration
Setting Up Your Email Client
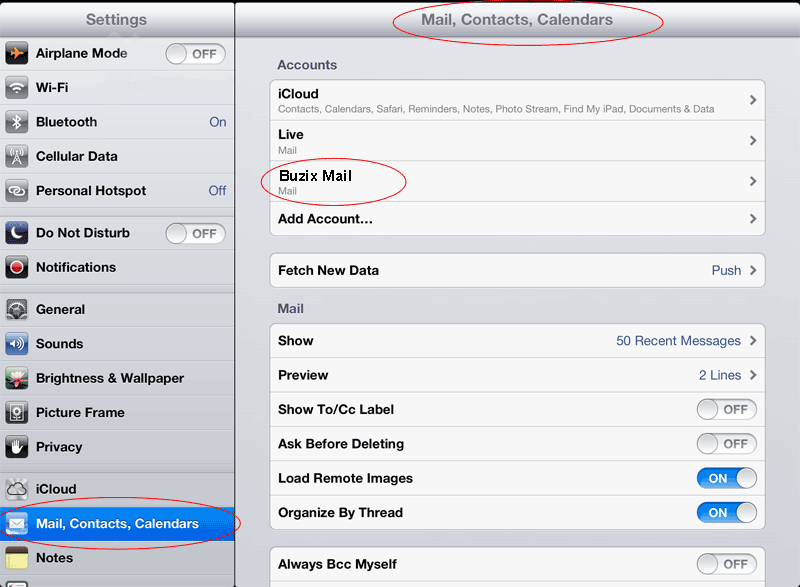
- Open your iPad's Settings
- Select "Mail, Contacts, Calendars"
- Create a new account or select an existing one
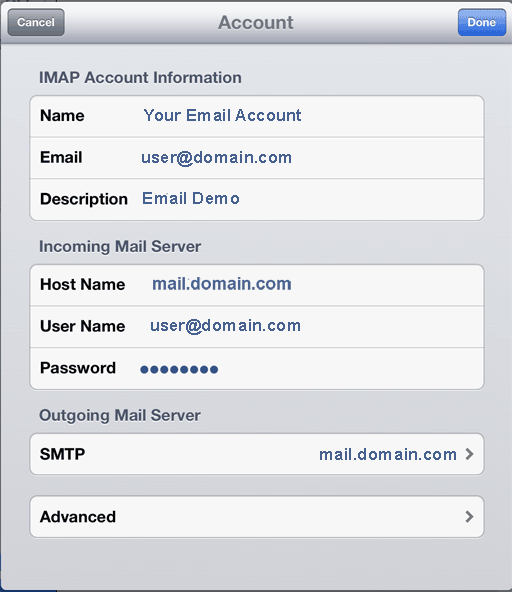
Incoming Email Configuration
- Enter your Name
- For your Email Address, use your username and domain (e.g., username@domain.com)
- Set the Host Name to your domain name
- For the Email Address, use your complete email address (e.g., user@domain.com)
- Enter your Password
- Select SMTP and proceed to the next step
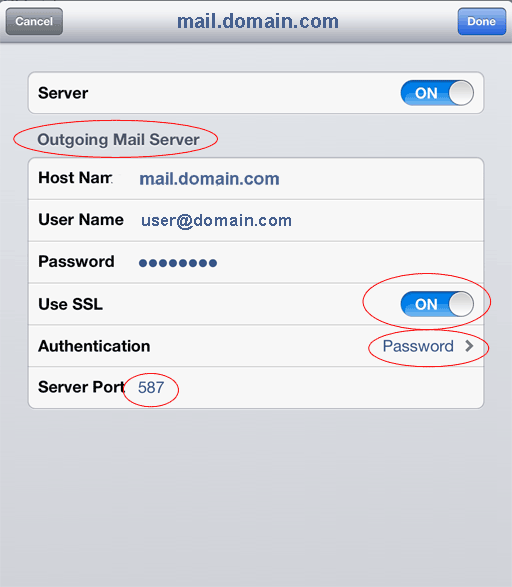
Turn on SMTP

Outgoing Mail Configuration
- Toggle the Server switch to ON
- Enter your valid Host Name
- Provide your valid User Name
- Enter your Password
- Enable Use SSL
- Set Authentication to "Password"
- Set Server Port to 587
- Select "Done" and proceed to Advanced
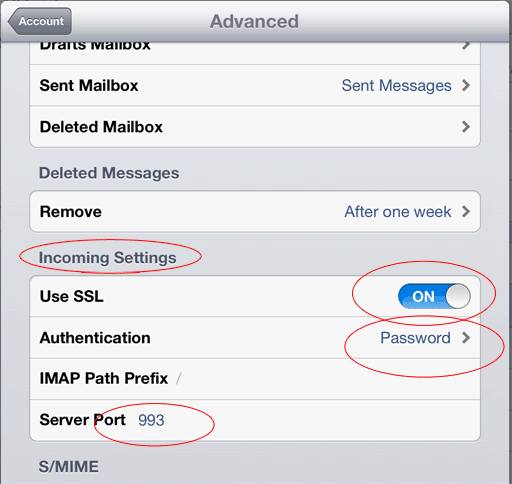
Advanced Incoming Mail Settings
- Enable Use SSL
- Select Authentication as "Password"
- Configure IMAP Path Prefix to '/'
- Set Server Port to 993